EDIT: This is our outdated method, we wrote a better modern tutorial here: Creating VR Illustration with Photohop CC 17 & 18 See ya on the other side!
EDITED 2019
For months, I’ve been researching a perfect way to create 360 virtual reality illustration, and I realised that there not much of decent tutorial out there.
So I am humbly sharing my approach on attempting the 360 degree art.
This tutorial is meant for Artists and Designers with basic knowledge of illustration, if you are new to digital painting or concept art this demo might not be as helpful.
The 360 Mapping Method

One of the most common method to create a 360 degree environment is by using Skymap or Cubemap and map it on a 3D cube. This method was widely used for Game Development in the early days. However, the method I am sharing today is using Equirectangular Image which looks something like this:
Image above from http://photo.stackexchange.com/questions/73481/how-can-i-edit-equirectangular-images
Entering 2016, I realised that Equirectangular Image is now a common format for Youtube or Facebook to recognise as a 360 degree image. There are more platform than ever in displaying 360 art now. Algorithm in these platform process your Equirectangular Image and unwarp it into virtual sphere for 360 degree effect. We are not learning to paint our artwork on a curvature template, instead we are going to convert the curvature image into proper perspective image for easy painting.
Once you master the concept, you can create your very own Virtual Reality concept art!
Preparation:
Painting Software – I will be using Adobe Photoshop CC in this demo, I believe the same idea can apply to any version of Photoshop.
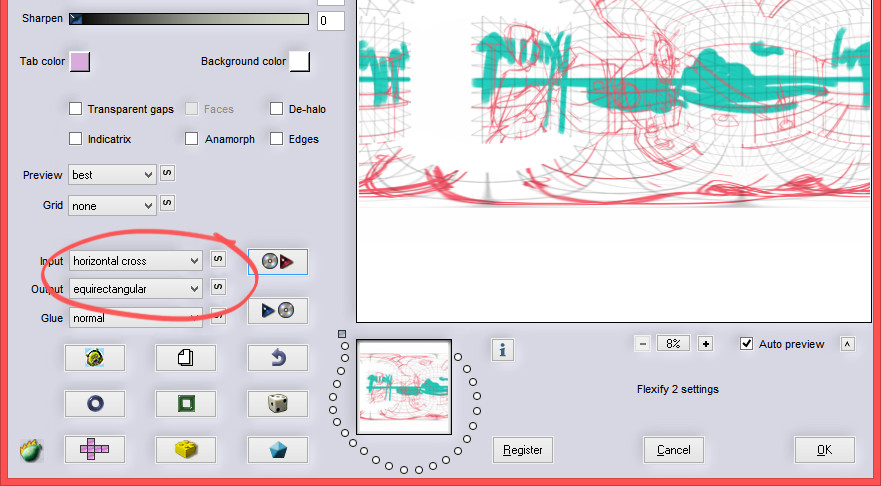
Equirectangular Conversion -The best plugin (that I’ve tried far) for these conversion is Flexify 2. I am using the trial version. This software can do variety of panoramic conversion, but for our case we only need Equirectangular to Horizontal Grid.
360 Preview – As a Motion Graphic designer, I am no stranger to Equirectangular Images. I often used it for my 3D production in Cinema 4D. If you wish to preview your 360 degree artwork during the production, you may try pannellum.org or simply upload your artwork to Facebook .
Step 1: Convert an Equirectangular Image to a Cubemap
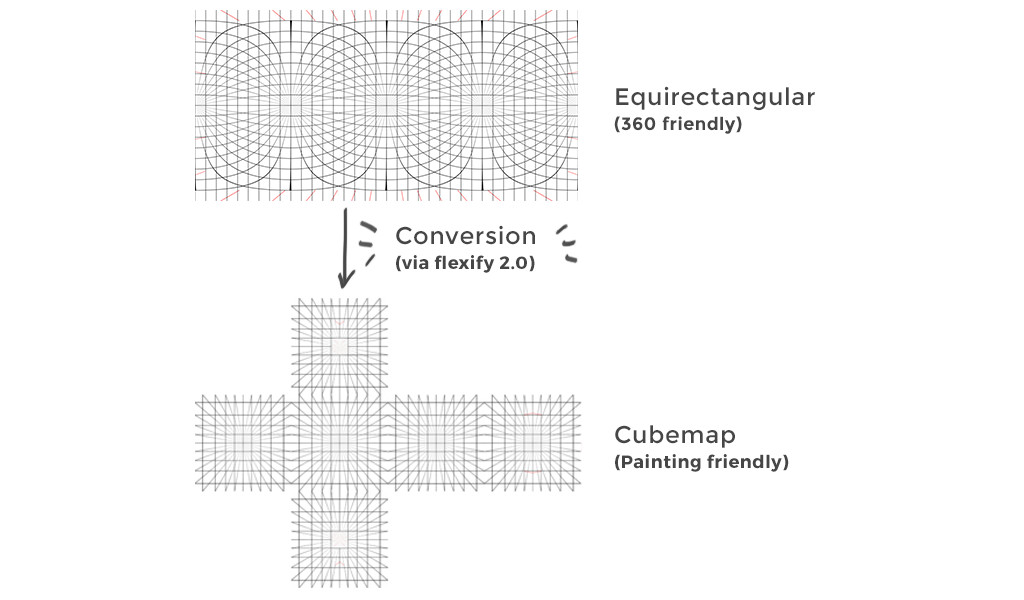

Prepare yourself an Equirectangular Grid like one below and begin converting it into Cubemap.
Begin converting the Equirectangular image using Flexify.

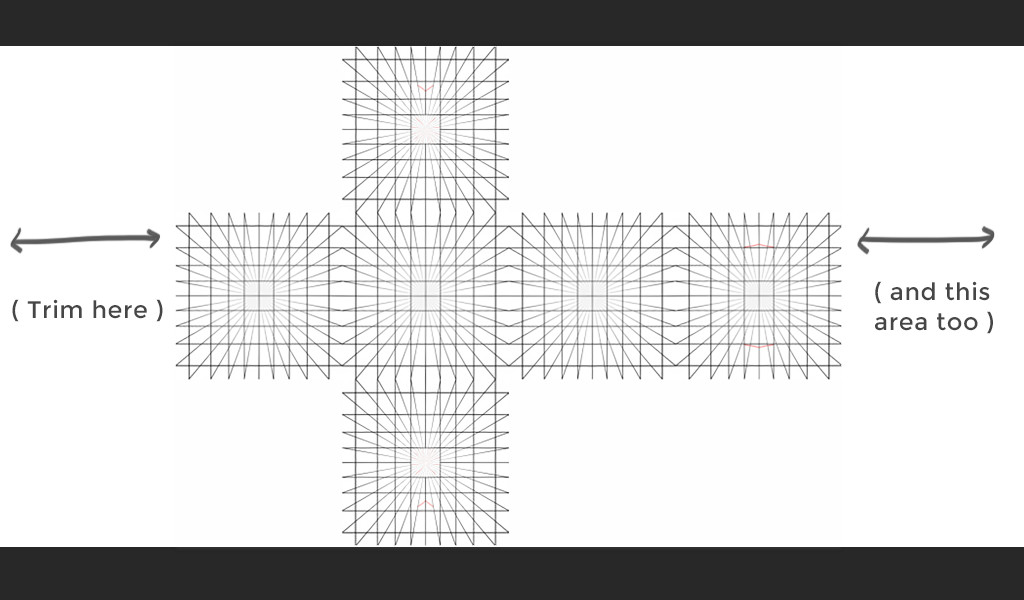
Unfortunately Flexify 2 is not made for this purpose, upon conversion you will find these empty white spaces on both sides of your image, these white spaces may create a lot of troubles in future steps, so get rid of them by trimming the spaces.

Step 2: Paint something on the Cubemap
Now you have a proper grid that are painting friendly, you may now begin to work on your magic!

SOME TIPS: Create a guide at the edge of each cube. Every time you draw something across an individual Cubemap, re-imagine your perpective into a new single point perspective. Always sees every Individual Cubemap as a new single-point-perspective-grid. Here is a simple gif that helps you to understand what I meant:

SOME MORE TIPS: During the sketching stage, I exported the artwork into Equirectangular Image ( which I am sharing how in the next step ) and preview it in 360 VR mode with Cinema 4D by adding the Equirectangular Image as texture to a sky object. I came back and forth between both software countless time to ensure the 360 illusion is perfect.
Take your time to get use to the perspective confusion, once you got a hang of it, everything will progress smoothly like a T-rex running on butter.
Step 3: Convert the Cubemap back to Equirectangular Image

Begin converting your Cubemap back to Equirectangular Image that are virtual reality 360 friendly.
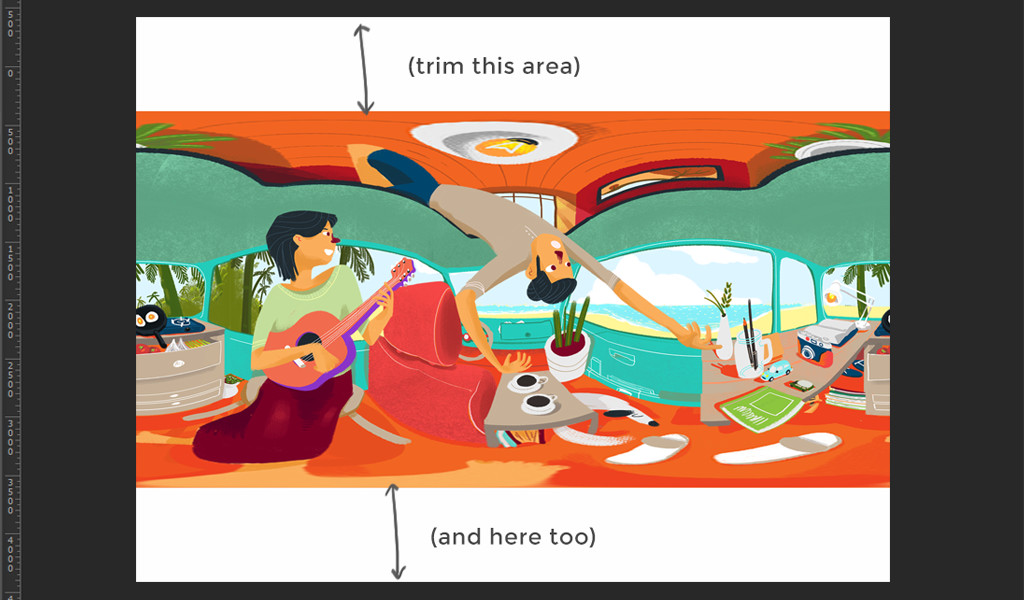
Trim the top and bottom white craps to achieve a perfect 2:1 aspect ratio for your Equirectangular Image.
Step 4: Edit the Metadata

Now your artwork are fresh from the oven and ready to upload to you preference Virtual Reality platform. In order to trick those platform to recognise your artwork as 360 Equirectangular Image, we will edit the metadata of the image itself.

Basically, you simply download this XMP Template and edit the metadata under file info in photoshop:
Detailed steps were perfectly described in Topher Mcculloch’s blog
Complete: Your Illustration in 360
That’s it, if you made it this far without confusion, please give yourself a cookie because you are obviously an advance user.
Check out the the completed 360 illustration of this demo here:
[vrview image=”//studiobehind90.com/wp-content/uploads/2016/05/360Bookoflai_preview.jpg” is_stereo=”false” start_yaw=”90″]
Send me me your artwork, I’d love to see how you inspire from this article!
Let’s have some discussion in the comment below if you have better method or ask any questions. Cheers guys, let’s just keep creating awesome work.